




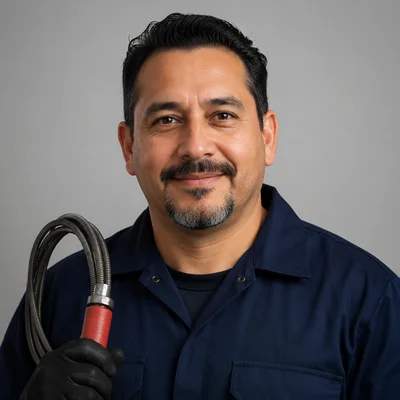









What does a leak specialist do in NYC?
A leak specialist in NYC finds hidden water leaks using non-invasive tools, then repairs the damaged pipe — all in one visit. They handle wall, slab, and underground leaks that a general plumber would miss.
What a leak specialist does
- Detection: Uses acoustic listening devices, thermal imaging cameras, and tracer gas to locate the exact leak point without cutting into walls or breaking concrete.
- Diagnosis: Performs water meter and pressure tests to confirm a leak exists and determine whether it’s in a supply line, drain line, or underground main.
- Repair: Cuts out the damaged pipe section and installs a repair coupling — solder or SharkBite for copper, crimp ring for PEX, rubber coupling for cast iron — then pressure-tests the fix.
- Documentation: Records leak location with photos and video for insurance claims, which NYC co-op and condo boards often require before approving repairs.
- Restoration: Dries out the wall cavity and patches the drywall so the homeowner doesn’t need a separate contractor for the finishing work.
Signs you need a leak specialist
- High water bill with no visible leak: A sudden $100+ monthly increase without a usage change is the single strongest indicator of a hidden supply-line leak.
- Musty smell or water stain with no active dripping: Water travels along pipes before it surfaces — a stain in the parlor ceiling might trace back to a leak three floors up.
- Dripping sound inside walls: You hear water running when no fixture is on; a leak specialist’s ground microphone can pinpoint that sound within inches.
- Warm spot on the floor or wall: A hot-water pipe leak creates a detectable temperature differential that a thermal imaging camera catches even through tile or hardwood.
Leak specialist vs plumber — which one do you need?
A general plumber and a leak specialist both hold the same NY Master Plumber license, but the specialist carries advanced diagnostic tools — thermal imaging, tracer gas, and acoustic correlators — that find hidden leaks without cutting into walls.
When to call a leak specialist vs a general plumber
| Scenario | Call a leak specialist | Call a general plumber |
|---|---|---|
| Hidden wall/ceiling leak with no visible pipe | Yes — non-invasive detection finds it without cutting | No — may start cutting drywall to locate |
| High water bill, no visible leak | Yes — water meter test + pressure test confirm | No — lacks diagnostic equipment |
| Visible leaking pipe under sink | No — general plumber handles this faster | Yes — direct repair, lower cost |
| Slab leak / underground leak | Yes — correlator + tracer gas pinpoint location | No — would need to break concrete to find it |
| Dripping faucet or running toilet | No — fixture repair is standard plumbing | Yes — quick, low-cost fix |
| Detection cost range | $150–$400 (credited toward repair) | N/A — detection not their specialty |
| Drywall repair cost if they cut | Included in our service | $500–$2,000+ extra |
Why one call to a leak specialist saves time and money
Our leak specialists are licensed master plumbers who both detect and repair the leak — one call, one truck, one 365-day warranty on the entire job. That means the same technician who runs the acoustic correlation test on a slab leak also cuts out the damaged copper section and installs the repair coupling, all in a single visit. In the field, I see homeowners call a detection-only company first, then wait for a separate plumbing crew to come back the next day — two service-call fees, two appointments, and a 24-to-48-hour delay before the leak is stopped. Calling a detection-only company first and a plumber second means paying two service-call fees and waiting for two appointments, which can delay repair by 24–48 hours.
How we find hidden water leaks — non-invasive detection that works
Yes — finding hidden leaks is our primary specialty. Non-invasive methods locate 90%+ of hidden water leaks without breaking walls or digging up floors.
How we find leaks behind walls and ceilings
- Thermal imaging scan: We sweep the wall or ceiling with a FLIR camera to spot temperature differentials — evaporating water creates a cold spot, hot water lines show as warm bands.
- Moisture meter confirmation: A pin-type meter inserted into drywall reads moisture content — normal is under 15%, saturated areas read above 30%, confirming the leak path.
- Acoustic pinpointing: A ground microphone on the wall surface picks up the hissing or rushing sound of escaping water through pipe fittings and drywall.
- Path tracing: Water travels 10+ feet along pipes inside a wall before appearing as a stain — thermal imaging traces that actual path, not just the visible spot.
- Key insight on hidden water leak detection: The visible water stain is rarely the leak source. We mark the true origin before opening any drywall, so the repair hole stays small — typically 12–18 inches instead of a full wall tear-out.
Slab leak detection without breaking concrete
For slab leaks under concrete foundations, we use a correlator with sensors placed on exposed pipes or fire hydrants — the computer calculates the leak location within 1–2 feet from sound travel time. A ground microphone then walks the grid over the slab to confirm the exact spot before any cutting begins. The correlator compares the time it takes for the leak sound to reach each sensor, and the math pinpoints the leak within inches. Slab leaks are often mistaken for foundation issues, leading homeowners to call a foundation contractor first and waste $500+ on unnecessary work — a leak specialist identifies the real source before anyone breaks concrete.
Equipment leak specialists use to find water leaks
Leak specialists use specialized equipment that general plumbers don’t carry — thermal cameras, acoustic sensors, tracer gas detectors, and pipe inspection cameras.
The 7 tools every leak specialist carries
| Tool | What it detects | How it works |
|---|---|---|
| Thermal imaging camera | Temperature differences from water | FLIR scans walls/floors — cold spots from evaporating water, warm spots from hot water leaks |
| Acoustic listening device / ground microphone | Leak sound through pipes and concrete | Technician walks grid pattern listening for hissing/roaring of escaping water |
| Tracer gas detector | Gas escaping at leak point | Injects 95% N2 / 5% H2 mix into pipe — sniffer finds gas only at the leak |
| Correlator | Leak location between two sensors | Sensors on fire hydrants/valves calculate location from sound travel time difference |
| Pipe inspection camera | Cracks, root intrusion, blockages | Flexible fiber-optic camera pushed into drain/sewer lines |
| Moisture meter | Moisture content in materials | Pin-type inserts into drywall/wood — normal <15%, saturated >30% |
| Pressure gauge | Pressure drop in supply lines | Attaches to hose bib — normal 40–80 PSI; rapid drop indicates supply leak |
Why non-invasive detection matters for your home
Non-invasive detection means we locate the exact leak point before cutting a single hole — your walls, floors, and concrete stay intact until we know exactly where to open. The thermal camera sweeps a room in minutes, the moisture meter confirms saturation levels, and the correlator pinpoints a slab leak within a couple feet. A general plumber without these tools may cut a 2×2 foot hole in your wall to find a leak that’s actually 10 feet away, turning a $400 repair into a $2,000 drywall restoration.
How to fix a leaking pipe in a wall
Once the leak is located, we repair the pipe, dry the wall cavity, and patch the drywall — all in one visit. Here’s the step-by-step process.
Step-by-step pipe repair in a wall
- Shut off and open: We close the main water valve, then cut a precise 12–18 inch access hole in the drywall around the leak point — no guesswork, no oversized demolition.
- Remove the bad section: We cut out 2–4 inches of pipe beyond the visible damage — copper gets a tubing cutter, cast iron gets a reciprocating saw with a carbide blade.
- Install the repair coupling: For copper we use a solder coupling or a push-fit SharkBite fitting; for PEX it’s a crimp ring and crimp tool; for cast iron we clamp on a rubber coupling with stainless steel bands.
- Pressure test and dry: We turn the water back on and check for drips, then run fans and a dehumidifier inside the wall cavity — drying takes 30 minutes for a small seep or up to 24 hours for a saturated section.
- Patch and finish: We install backing, cut a drywall patch, tape the seams, apply three coats of joint compound, sand, prime, and paint — the whole repair from shut-off to paint runs about two hours, not counting compound drying time.
- What not to do: The most common mistake homeowners make is calling a drywall contractor first — the leak usually returns because the pipe wasn’t repaired, and you pay twice.
Pipe materials and which repair method works best
| Pipe material | Repair method | Tools needed | Time |
|---|---|---|---|
| Copper | Solder coupling or push-fit (SharkBite) | Torch, flux, solder / no tools for push-fit | 15–20 min |
| PEX | Crimp ring + crimp tool or push-fit (SharkBite) | Crimp tool / no tools for push-fit | 10–15 min |
| Cast iron | Rubber coupling (Fernco/Proflex) with stainless clamps | Screwdriver or socket wrench | 10–15 min |
How leak specialists detect underground leaks
Underground leaks between the street and your house require a different approach — correlators, ground microphones, and tracer gas pinpoint the leak without digging up your entire yard.
The 8-step underground leak detection process
- Meter and pressure test: We shut off all fixtures and check the meter — if it spins, the leak is between the meter and house. A pressure gauge attached to a hose bib confirms the drop.
- Pipe locating: An electromagnetic locator traces the buried pipe path from the house to the street shut-off so we know exactly where the line runs.
- Acoustic correlation: We place sensors on fire hydrants or exposed pipe at two known points. The correlator computer calculates the leak location within 1–2 feet from sound travel time difference.
- Ground microphone grid: Walking the suspected area in a grid pattern, the ground microphone amplifies the hissing or roaring sound of escaping water through soil and pavement.
- Bar hole testing: A 3/8-inch drill bit creates small holes through pavement or soil every 2–3 feet along the pipe path, and a listening rod inserted into each hole pinpoints the strongest sound.
- Tracer gas injection: If acoustic methods are inconclusive, we inject a 95% nitrogen / 5% hydrogen mix into the pipe. The gas escapes only at the leak point, and the sniffer detector locates it within inches.
- Mark and excavate: The exact spot gets spray-painted, and we dig a 2×2 foot access hole with a mini-excavator or hand tools — no trenching the entire yard.
- Repair and restore: The damaged pipe section gets cut out and replaced, then we backfill the hole. Underground leaks waste 10–30 gallons per hour on average — a pinhead-sized leak can add $200+ to your monthly water bill before any wet ground appears.
What happens after we find the underground leak
After pinpointing the leak, we mark the spot, dig a 2×2 foot access hole with a mini-excavator or hand tools, repair the pipe section, pressure-test, and backfill — all in one visit. The repair coupling we use depends on the pipe material: copper gets a solder or push-fit SharkBite coupling, while older cast-iron lines get a rubber coupling with stainless-steel clamps. We pressure-test the line to 60–80 PSI before covering the repair. We dig only at the marked location — not a trench along the entire pipe — which means less disruption to your yard, driveway, or sidewalk and lower restoration costs.
How to prevent water leaks in your home
Most water leaks are preventable with simple maintenance. Here’s what NYC homeowners should check to avoid costly hidden leaks.
10 preventive steps every NYC homeowner should take
- Check water pressure: Keep it below 80 PSI — anything above that blows out toilet fill valves, washing machine hoses, and faucet cartridges. Install a pressure regulator if yours reads high.
- Replace washing machine hoses: Rubber hoses last 3–5 years before they burst and cause $5,000+ in damage. Swap them for stainless steel braided hoses.
- Inspect the water heater annually: Look for rust around fittings, a dripping T&P valve, or pooling water at the base. Tank units need replacement every 8–12 years; tankless models need yearly descaling in NYC’s hard water.
- Monitor your water bill monthly: A sudden $50–$200 increase with no change in usage is the strongest indicator of a hidden supply-line leak. The meter doesn’t lie.
- Winterize outdoor pipes: Disconnect garden hoses, shut off outdoor spigots, and insulate exposed pipes in unheated basements or crawlspaces. A frozen pipe bursts at 30+ PSI.
- Replace toilet flappers every 1–2 years: A worn flapper causes a silent leak that wastes 200+ gallons a day — that’s a $50–$100 monthly bump on the water bill for a $5 part.
- Inspect under-sink connections: Check supply line connections, drain pipe joints, and garbage disposal for drips. Tighten or replace as needed before the cabinet floor rots out.
- Know your shut-off valve locations: The main shut-off is at the water meter; fixture shut-offs sit under sinks and behind toilets. If you find a leak, shut off immediately.
- Install water leak detectors: Battery-powered alarms near the water heater, washing machine, and under sinks cost $15–$50 each and alert you before a pinhole leak becomes a flood.
- Maintain the sump pump: Test monthly, clean the intake screen, and replace every 5–7 years. A failed pump during heavy rain sends water straight into the basement.
NYC-specific leak risks by building type
Brownstones with cast iron stacks face pinhole leaks from internal rust that can spray water without warning — the corrosion happens from the inside out, invisible until it breaks through. High-rises deal with pressure regulator failures that send 100+ PSI into the unit, blowing out toilet fill valves and washing machine hoses in a cascade. Co-ops see slab leaks from aging copper supply lines under concrete — the water travels along the pipe and stains a ceiling three floors below the actual source. In multi-family buildings, a leak in an upper unit can travel down pipe chases and appear as a ceiling stain on a lower floor, so the source is rarely where the stain shows.
Conclusion
A hidden water leak costs more than the repair bill — it drives up your water bill and sets the stage for mold and structural damage. Acting on the early signs saves thousands in remediation work.
Main takeaways
A leak specialist finds hidden water leaks using non-invasive equipment — thermal imaging, acoustic listening, and tracer gas — then repairs the pipe in the same visit, saving time and avoiding unnecessary demolition. The acoustic listening device picks up the hiss of a pinhole leak through a cast iron stack in a Brooklyn brownstone; the thermal camera spots the cold band where evaporating water cools a Manhattan high-rise ceiling. In the field, that combination of tools catches about nine out of ten leaks without cutting a single hole in the wall. The key to preventing major water damage is acting on early signs — a high water bill, musty smell, or water stain — before the leak causes structural damage or mold growth that costs thousands to remediate.


